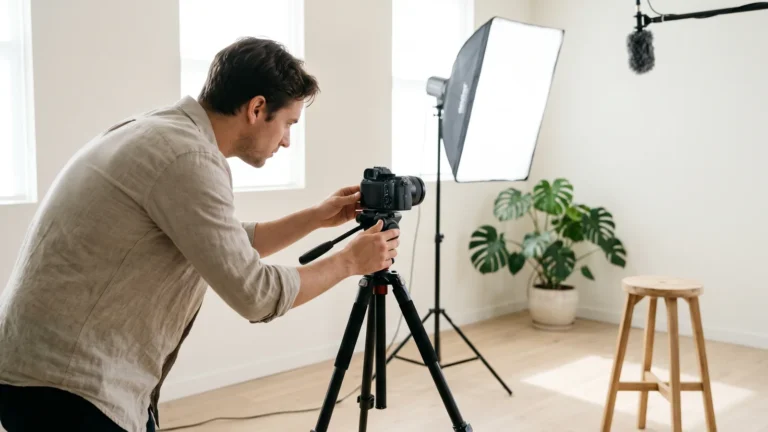
The youtube shorts aspect ratio to use is 9:16 vertical, delivered as a single MP4 of up to three minutes — square files are accepted too — and 1080 × 1920 is our recommended export size for that shape, not a YouTube-documented spec.

Quick steps — the settings to copy before you edit
Set these five things and the file will behave:
- Build the project at 9:16 vertical; 1080 × 1920 pixels is our recommended size for that ratio.
- Keep faces, text and logos out of the top and bottom strips where the Shorts interface sits.
- Trim the finished cut to three minutes or less — and to at least five seconds if you are assembling it inside the Shorts editor on Android.
- Export one MP4 with no black bars added anywhere in the frame.
- Upload from the YouTube app or YouTube Studio, then confirm the video carries the Shorts label.
Vertical here is not a taste question, it is the shape of the player. Google’s own ad specs state that vertical 9:16 videos are best suited to the Shorts format and perform better than landscape assets, which is the plainest official statement you will find on framing. Everything else on the list — resolution, container, bitrate — only decides how clean that vertical frame looks after YouTube re-encodes it.
The audience for getting this right is enormous. YouTube Shorts averaged 200 billion daily views as of June 2025, according to CEO Neal Mohan’s Cannes Lions keynote reported by TheWrap. A mis-sized file does not get rejected; it just sits in that feed looking smaller and softer than everything around it.
What to decide first — Shorts specs, limits and when square still works
Two decisions come before any editing: the shape of your frame, and the ceiling you are cutting to. Everything downstream follows from those. YouTube states that videos uploaded on or after October 15, 2024 with a square or vertical aspect ratio and a length up to three minutes are categorized as Shorts, so classification is automatic rather than something you toggle on.
| Setting | What to use | Source or basis |
|---|---|---|
| Aspect ratio | 9:16 vertical | Google Ads Help (Shorts ad asset specs): 9:16 best suited to Shorts |
| Also accepted | Square 1:1 | YouTube Help: square or vertical files |
| Resolution | 1080 × 1920 | Our recommended default for 9:16 at 1080p, not a YouTube spec |
| Length window | Up to 3 minutes; 5-second minimum when uploading clips into the Shorts editor on Android | YouTube Help (computer upload; Shorts editor, Android) |
| Container | MP4 | YouTube Help, recommended upload encoding settings |
| Added music | Up to 90 seconds, song depending | YouTube Help (Shorts creation tools) |
| Frame rate | Match your camera: 24, 25, 30, 50 or 60 fps | Pick one and keep it across clips |
A square 1:1 master still earns the Shorts treatment, and that is useful if one cut has to serve a feed post and a Short at the same time. The trade-off is screen area: on a phone, a square frame leaves tall empty space above and below your subject, so faces read smaller and burned-in captions have less room. Choose square only when a single master genuinely has to travel; otherwise cut a dedicated vertical version.
Step 1 — Set a 9:16 vertical 1080 × 1920 canvas and mark the safe zone
What you need: your editor of choice and footage shot with the camera held vertically. Create the sequence or project at 1080 × 1920 before you drop a single clip in — resizing a landscape timeline afterwards is where black bars creep in. Google Ads Help’s Shorts ad asset specs describe vertical 9:16 as the shape best suited to Shorts, and 1080 × 1920 is our recommended 1080p expression of that ratio rather than a documented YouTube requirement.
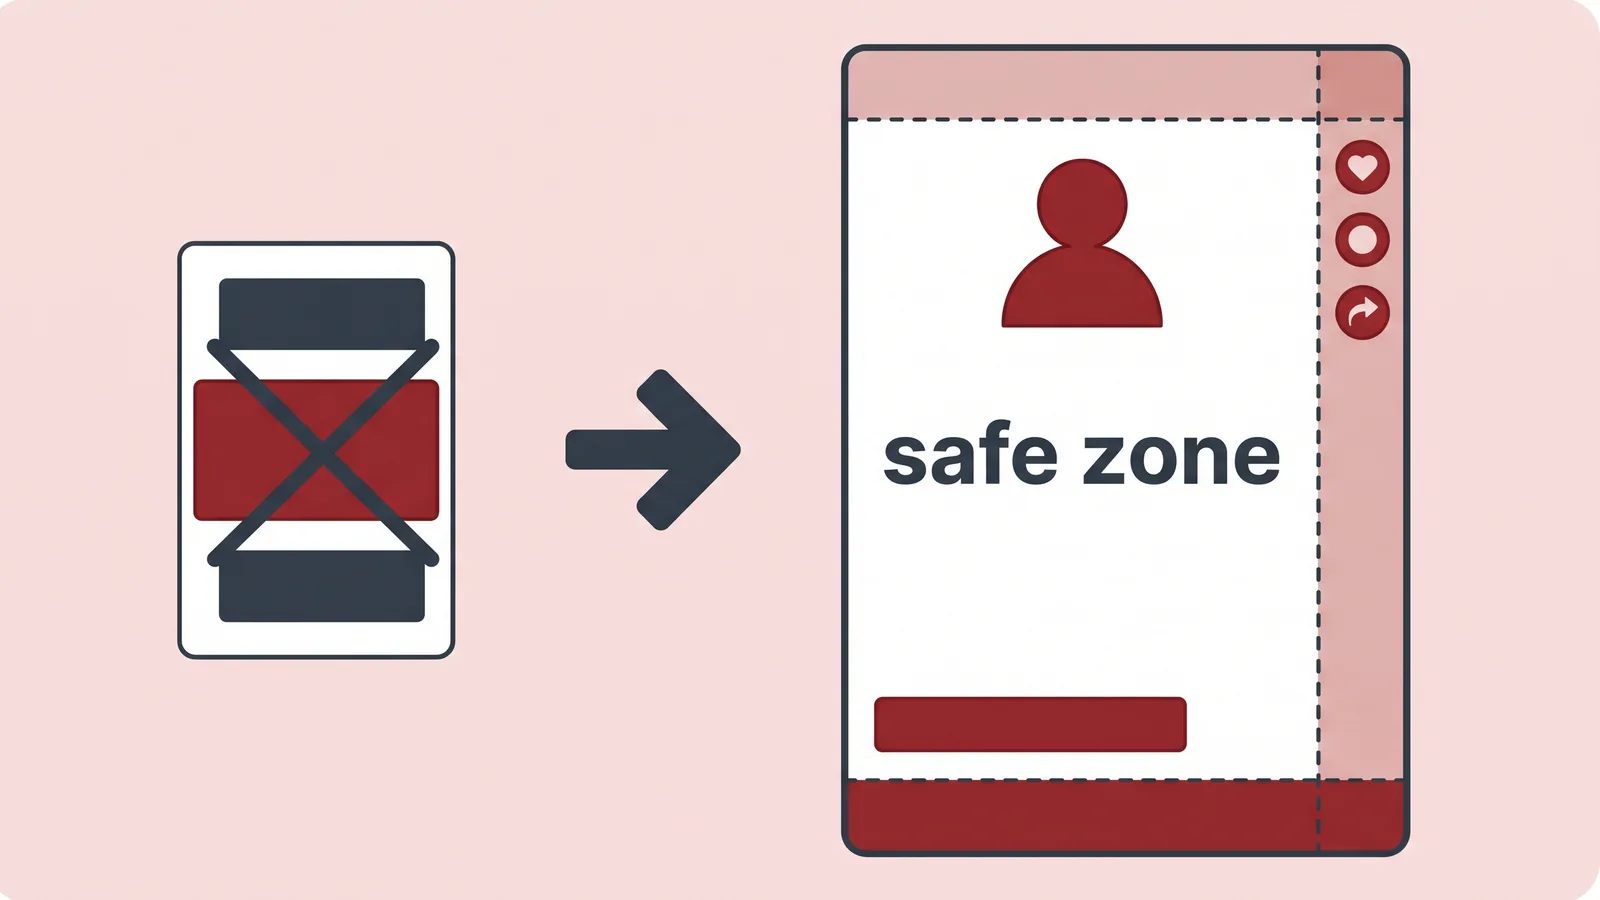
Next, mark the safe zone. The Shorts player stacks interface over your video: a title and channel name along the bottom, a column of buttons on the right, and system elements near the top. Draw two guide rectangles — a shallow band across the top and a deeper one across the bottom plus the right-hand column — and keep anything you need the viewer to read outside them.
Subjects belong in the upper-middle third of the frame, not dead center, because the bottom of the frame is partly covered. If you shoot in 4K vertical, that extra resolution gives you room to reframe a face without softening the final 1080 × 1920 export. Captions work hardest when they sit just above the title band in a heavy sans-serif. The framing only pays off if the first line of dialogue earns attention, so pair it with a script built to hold viewers past the opening seconds.
Step 2 — Cut to length: three minutes maximum, five-second floor in the Android Shorts editor
What you need: your assembled timeline and a hard decision about what to cut. YouTube’s official upload instructions for Shorts on a computer say the file must be up to 3 minutes long with a square or vertical aspect ratio, so three minutes is the ceiling, not the target. When uploading clips into the Shorts editor on Android, YouTube allows up to three minutes of total assets with a minimum of five seconds, which sets the floor for anything built inside the app.
Length is an editing choice inside that window. A single demonstration, one joke or one tip usually lands under thirty seconds. A story with a setup and a payoff can justify a minute or more, provided every shot moves it forward.
Use this test on each clip: if removing it does not break comprehension, remove it. Trim the first beat hardest — openings carry the most dead weight, and a Short that starts with throat-clearing loses viewers before the point arrives. Watch the cut once with the sound off to spot sections where nothing visually changes; those are the parts to tighten. Keep a tail of at least a few frames after the final word so the loop back to the start does not clip audio.
Step 3 — Export as MP4 at YouTube’s recommended bitrate with no black bars
What you need: your finished timeline and your editor’s export dialog. YouTube’s recommended upload encoding settings specify MP4 as the container format, and most editors label this preset simply "MP4" or "H.264" — pick it and leave the rest of the preset alone unless you have a specific reason to change it.
Bitrate is the setting creators most often leave too low. YouTube’s recommended SDR upload bitrate for 1080p is 8 Mbps at standard frame rates of 24, 25 or 30 and 12 Mbps at high frame rates of 48, 50 or 60, according to YouTube Help. Set your export to match the frame rate you actually shot, then set the bitrate accordingly.
The last check is the frame itself. YouTube’s formatting specifications say videos should keep their native aspect ratio and should never be uploaded with letterboxing or pillarboxing bars, so a vertical clip floating inside a 16:9 export is a defect, not a style. Open the exported file and scrub to a bright shot: if you see black strips on any edge, the sequence settings were wrong, not the export. Fix it in the timeline and export again rather than cropping the finished file.
Step 4 — Upload through the YouTube app or YouTube Studio so the file isn’t re-cropped
What you need: the exported MP4 on the device you are uploading from, plus your title and description text ready to paste. Two routes work. In the YouTube app, the Shorts creation tools let you record short-form videos up to 3 minutes long using a multi-segment camera, and the same flow accepts a finished file from your camera roll.
The desktop route runs through YouTube Studio. In YouTube Studio you can select up to 15 short videos at a time when uploading Shorts from a computer, which is how a batch of a week’s clips goes up in one session. Upload the original export, not a copy that has been through a messaging app — chat apps recompress video and can change the frame.
Fill in the title, then let the description carry context for search. Avoid re-trimming inside the uploader if your edit is already final; every extra pass is another re-encode. If you are still deciding between phone and desktop for routine publishing, this walkthrough of both Shorts upload routes step by step covers the differences in detail. Publish, then move straight to verification — do not assume it worked.

Check it worked — ratio, resolution, length and Shorts classification
Open the published video on a phone first. A correct file fills the screen edge to edge with no grey or black strips, and your captions sit clear of the title bar at the bottom. Tap into your channel page and look for the video under the Shorts shelf rather than the regular uploads grid — that shelf placement is the clearest sign YouTube classified it as a Short. YouTube states that videos uploaded on or after October 15, 2024 with a square or vertical aspect ratio and a length up to three minutes are categorized as Shorts, so a file inside those bounds that lands in the wrong place almost always has a ratio or duration problem.
Final checklist
- Frame is 9:16 vertical, exported at the recommended 1080 × 1920 default, confirmed in the editor’s sequence settings.
- Nothing important sits in the top band, the bottom band or the right-hand button column.
- Runtime is three minutes or less — and at least five seconds if the clips were uploaded into the Shorts editor on Android.
- Export is a single MP4 at the bitrate matching your frame rate.
- No black bars on any edge when played full screen on a phone.
- The published video appears under the Shorts shelf on your channel.
The mistake that costs the most views
The common failure is editing on a 16:9 landscape timeline and dropping vertical footage into it, which pillarboxes the clip between two black columns. YouTube’s formatting specifications say videos should never be uploaded with letterboxing or pillarboxing bars, and the result in the feed is a small floating rectangle instead of a full screen. Avoid it by setting the sequence to 1080 × 1920 as the very first action in a new project, before importing anything. Getting this routine repeatable matters more than any single upload — it is the same discipline behind a realistic 90-day plan to reach 1,000 subscribers.
Frequently asked questions
Does a square 1:1 video still count as a YouTube Short?
Yes. YouTube’s official upload instructions for Shorts on a computer say the file must be up to 3 minutes long with a square or vertical aspect ratio, so a 1:1 export qualifies. A 9:16 frame still fills far more of the phone screen.
What resolution and bitrate should I export Shorts at?
Export 1080 × 1920 as a practical default for 9:16 — that is our recommendation derived from 1080p, not a published YouTube figure. YouTube’s recommended SDR upload bitrate for 1080p is 8 Mbps at standard frame rates of 24, 25 or 30 and 12 Mbps at high frame rates of 48, 50 or 60.
How much music can I add to a Short?
Depending on the song, YouTube’s creation tools may let you add up to 90 seconds of music, according to YouTube Help. Track availability varies, so check inside the Shorts editor before you build an edit around one piece of music.
Can I upload several Shorts at once from a computer?
Yes. YouTube Help states that in YouTube Studio you can select up to 15 short videos at a time when uploading Shorts from a computer, which makes batching a week of vertical clips into one publishing session practical.
Can I just crop an existing 16:9 video into 9:16?
You can, but reframe rather than crop blindly. Centre crops usually cut off faces and on-screen text, so reposition each shot, scale up only where the source resolution allows it, and rebuild captions inside the vertical safe zone before exporting.
Sources
- Upload YouTube Shorts – Computer – YouTube Help
- Understand three-minute YouTube Shorts – YouTube Help
- Get started creating YouTube Shorts – YouTube Help
- Create YouTube Shorts – Android phone and tablet – YouTube Help
- YouTube Shorts ads: Asset specs and best practices – Google Ads Help
- YouTube recommended upload encoding settings – YouTube Help
- Video and audio formatting specifications – YouTube Help
- YouTube Shorts Now Averages 200 Billion Daily Views – TheWrap
This article was drafted with AI assistance and published by the YouTube Creators Editorial Team after its facts were checked against the sources listed above.